 Back to Helldivers 2


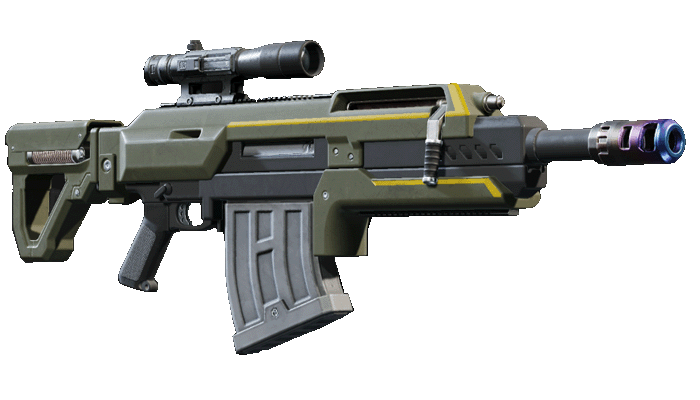
The Eruptor is an extremely strong primary, especially versus the Illuminate. While we recommend the Eagle Strafing Run against the Illuminate to take down their shields quickly, the Eruptor can take them out with a single shot, freeing up a Stratagem slot. The Eruptor is also capable of taking out Harvesters, Stingrays, Warp Ships, and hordes of Voteless from afar. The downside is the Eruptor leaves you very vulnerable due to its slow reload, and firing explosive rounds point blank will usually kill your diver.
This build is focused on letting the Eruptor shine, while patching its vulnerabilities with key Stratagems.
Recommended Weapon
Warbond: Democratic Detonation
The R-36 Eruptor is capable of taking out those pesky Stingrays in just two shots, though with projectile travel time you’ll need to lead it a bit.
It fires an explosive round that either explodes on impact (hitting an enemy), or after 1s of travel time. This gives it a maximum range of 180m.
It can also destroy grounded Warp Ships in 3 shots, Harvesters in 3 shots (1 to the shield, 2 directly to the leg joint), and 1-tap Overseers with headshots. Finally, Fleshmobs can be taken out in 2-4 shots depending on shot placement.
It can be used to clear hordes of Voteless, though we don’t recommend firing point blank, and would delegate such a responsibility to a handy Secondary or Support weapon.
This is an incredibly slow firing weapon, running the Siege-Ready passive can improve the weapon performance dramatically.
Core Stratagems

![]()
![]()
![]()
![]()
![]()
![]()
Cost: ![]() 3,500, Unlocked at Level 1.
3,500, Unlocked at Level 1.
Extremely fun to use, fires light-armor penetrating rounds up to 1150 RPM.
Unlike its bulkier MG-43 and MG-206 counterparts, the Stalwart can be reloaded on the move, making it a much better choice against the Terminids.

The Gatling Sentry will mow down the hordes of Voteless while the Eruptor makes short work of Overseers and Fleshmobs. If needed, you can always swap to your Stalwart.
Recommended Stratagems

The AX/AR-23 Guard Dog has medium armor pen, which can bring down Overseers.
It’s also great for 360 coverage, preventing Voteless from sneaking up on you.
Great tool to have equipped when your sentries are on cooldown.
The medium armor pen MG-43 Sentry makes short work of Overseers. Call it down while your Gatling Sentry is on cooldown, or call both down simultaneously if you’re about to be overrun.