 Back to Helldivers 2
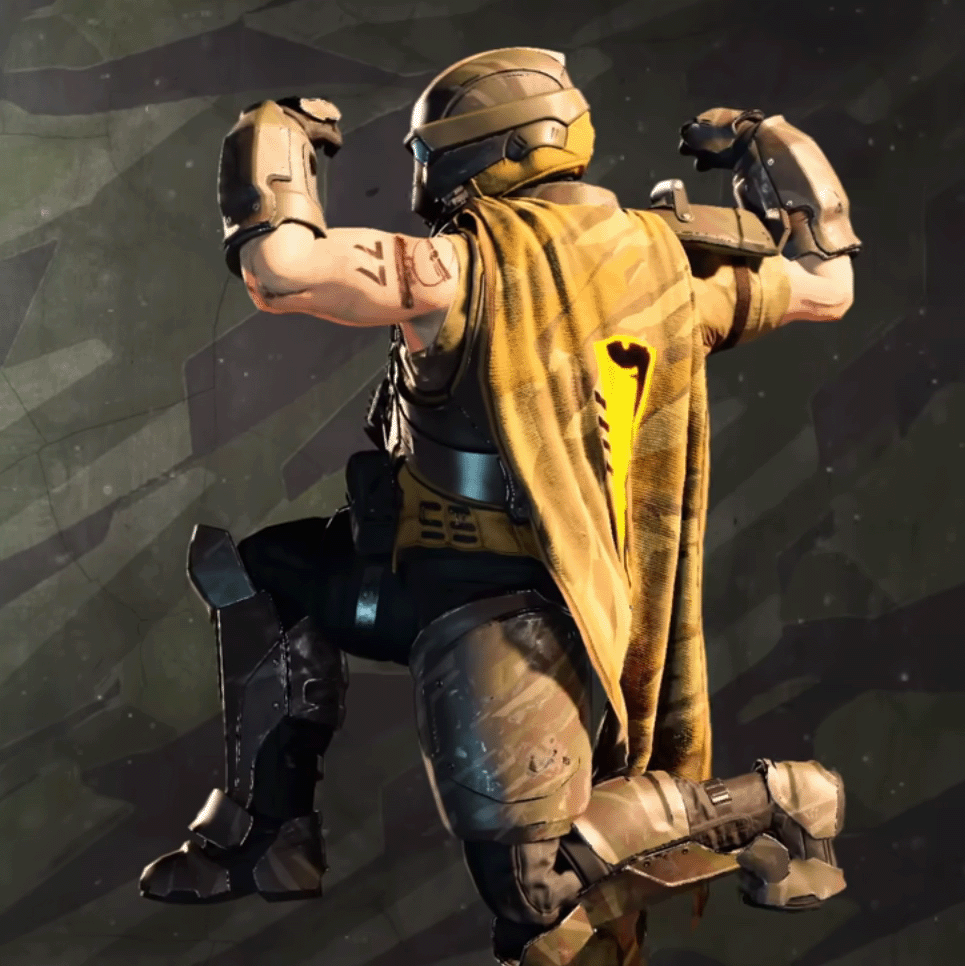


Spreading Democracy has never been so fun. This build utilizes the Peak Physique passive on the PH-202 Twigsnapper Heavy Armor to further enhance the bayonet damage on the R-2124 Constitution. With this setup, the bayonet is capable of one-shotting Hunters and Warriors. Utilizing Stun Grenades, you can also take down Brood Commanders with a few well-placed stabs
Recommended Weapon
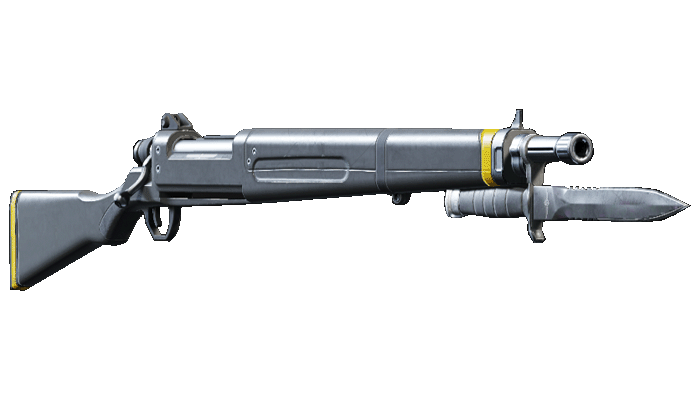
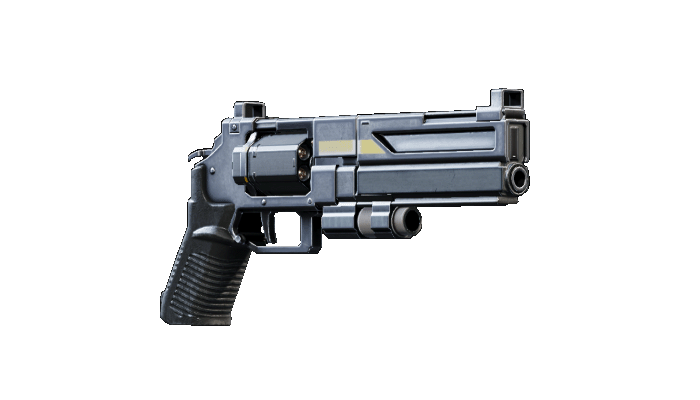
The Constitution is a single-shot bolt-action rifle, it has no scope and is equipped with a fixed bayonet. The bayonet deals incredible damage and counts as a melee weapon. Pair it with the Peak Physique passive to boost its damage by 50%.
Core Stratagems

![]()
![]()
![]()
![]()
![]()
![]()
The Guard Dog Rover is an exceptionally effective machine for slaying unarmored Terminids. The Rover has no ammo constraints. It can fire its laser continuously for several minutes before needing a brief recharge.
The Rover excels while on the move, rotating to eliminate any Hunters, Scouts, or Warriors that are chasing you.
However, it has two notable drawbacks.
- The first is a double-edged sword: its long aggro distance can be a lifesaver by alerting you to bugs before they get too close, but it can be problematic if you prefer a stealthy approach, as it will engage enemies from afar.
- Second, the Rover does not stop firing its laser when aiming at a bug, so if you or an ally step between the Rover and its target, a Helldiver is going to get scorched.

Recommended Stratagems
![]()
![]()
![]()
![]()
![]()
Cost: ![]() 10,000, Unlocked at Level 15.
10,000, Unlocked at Level 15.
The Orbital Laser is an incredibly powerful stratagem, though you’re only allowed 3 uses per game, and it is on a significant cooldown.
It will effortlessly slice through a field of enemies. It’s a “Throw and forget” kind of stratagem, as the targeting is handled automatically as the laser travels enemy-to-enemy. It’s capable of taking out bug holes and fabricators, as well as heavies such as the Titan, Hulk and Impaler.

![]()
![]()
![]()
![]()
Cost: ![]() 4,000, Unlocked at Level 2.
4,000, Unlocked at Level 2.
The Eagle Airstrike is one of the most popular Eagle Stratagems in the game and is highly effective against almost every enemy you will come across including. Landing an Eagle Airstrike at the right angle can instantly kill a Charger, Tank, Hulk and will deal a decent amount of damage to the Factory Strider and Bile Titan. It is also effective at clearing out waves of lighter enemies.
- 2 uses per rearm
- 15s cooldown